
Kubernetes is an open source platform for managing containerised applications.
IPv6 is the next generation Internet protocol, and running on IPv6 only simplifies configuration and administration, and avoids the performance issues and complexities of IPv4 encapsulation, NAT, and conflicting private address ranges.
The default configuration of Kubernetes is IPv4, and there are few, and scattered, examples and guidance for setting up IPv6 dual stack, let alone single stack.
I have collected instructions from the different sources into a single guide to successfully deploy Kubernetes with IPv6 only.
See the guide for full instructions:
https://github.com/sgryphon/kubernetes-ipv6
The blog post contains some additional background on what I did to gett the deployment working. The deployment was tested on Ubuntu 20.04 running on an IPv6 only virtual server from Mythic Beasts.
Background
Why containers?
Containers are a sweet spot with the isolation benefits of running in separate virtual machines, but with much less overhead.
This diagram, from the Kubernetes overview documentation, shows the evolution from traditional deployment (everything on one server, difficult dependency management, difficult physical scalability), through to virtualized deployment (provides isolation and scalability, but with high overhead), and now container deployment.

Kubernetes is a platform for managing containerised applications at scale.
Why IPv6?
The IPv4 problem
Kubernetes is often deployed using IPv4, although it now supports IPv6 (both stand alone and dual stack).
With IPv4, Kubernetes uses private address ranges for Pods and Services, with overlay networks to route across the cluster (with encapsulation overhead), and NAT gateway overhead to get in and out.
Hosts might be running on virtual servers, themselves in a private address virtual network, using NAT, with another layer of carrier grade NAT on top of that — NAT within NAT within NAT.
Dual stack means you need not only to add IPv6, but also continue to maintain the complexity of IPv4.
The IPv6 solution
Kubernetes IPv6 single stack (IPv6 only), once set up, is much easier to manage and maintain, although it is not the default so needs initial configuration, and has less documentation and examples available.
Using IPv6 only you no longer need to worry about the overhead of encapsulation, or about potential NAT private range collisions, and can get direct IPv6 access to all elements of the deployment.
Deploying Kubernetes with IPv6 only
Full instructions, and downloadable configuration files, are available in the guide on Github: https://github.com/sgryphon/kubernetes-ipv6
The guide provides a complete run through from the start to a working IPv6 only Kubernetes machine. It has been tested on Ubuntu 20.04 running on an IPv6 only virtual server from Mythic Beasts. I ended up re-installing the operating system several times as I worked out the kinks and dead ends.
Note that you need to have DNS64 + NAT64 available to your IPv6 only server, as the installation uses several resources (Docker registry, Github) that are still IPv4 only.
There are several main steps required:
- Set up a container runtime
- Install Kubernetes components
- Set up the Kubernetes control plane
- Deploy a Container Network Interface (CNI)
- Configure routing
- Add management components
Set up a container runtime
The example on Github uses Docker CE, from https://kubernetes.io/docs/setup/production-environment/container-runtimes/, with a few tweaks.
I initially tried to get it working with just containerd, but found there were too many dependencies in Kubernetes that assumed docker was being used.
Install Kubernetes components
This is as simple as installing the kubeadm, kubelet, and kubectl components, from https://kubernetes.io/docs/setup/production-environment/tools/kubeadm/install-kubeadm/
Originally I looked at some of the local Kubernetes installation options, but didn't have much luck. Initially I tried to set them up without NAT64, but found they all relieved on IPv4 services for installation. I eventually (with NAT64) tried to set up MicroK8s as the simplest for an Ubuntu system, but was struggling to get IPv6 working.
About that time during my research I came across a talk by André Martins, https://www.youtube.com/watch?v=q0J722PCgvY
This included an Kubernetes IPv6 configuration set up from scratch, using the Cilium network plug in. Rather than set up each component manually, I wanted to create a configuration template file that could be used with kubeadm for one step setup.
Set up the Kubernetes control plane
Making the changes described by André to a kudeadm configuration file, I was able to build a configuration file that can be used to deploy the Kubernetes control plane in a single step.
A template kubeadm IPv6 configuration file can be downloaded from the Github repository, with instructions to modify.
apiVersion: kubeadm.k8s.io/v1beta2
kind: InitConfiguration
localAPIEndpoint:
  advertiseAddress: 2001:db8:1234:5678::1
nodeRegistration:
  criSocket: /var/run/dockershim.sock
  name: node0001
  kubeletExtraArgs:
    cluster-dns: 2001:db8:1234:5678:8:3:0:a
    node-ip: 2001:db8:1234:5678::1
---
apiServer:
  extraArgs:
    advertise-address: 2001:db8:1234:5678::1
    bind-address: '::'
    etcd-servers: https://[2001:db8:1234:5678::1]:2379
    service-cluster-ip-range: 2001:db8:1234:5678:8:3::/112
apiVersion: kubeadm.k8s.io/v1beta2
controllerManager:
  extraArgs:
    allocate-node-cidrs: 'true'
    bind-address: '::'
    cluster-cidr: 2001:db8:1234:5678:8:2::/104
    node-cidr-mask-size: '120'
    service-cluster-ip-range: 2001:db8:1234:5678:8:3::/112
etcd:
  local:
    dataDir: /var/lib/etcd
    extraArgs:
      advertise-client-urls: https://[2001:db8:1234:5678::1]:2379
      initial-advertise-peer-urls: https://[2001:db8:1234:5678::1]:2380
      initial-cluster: __HOSTNAME__=https://[2001:db8:1234:5678::1]:2380
      listen-client-urls: https://[2001:db8:1234:5678::1]:2379
      listen-peer-urls: https://[2001:db8:1234:5678::1]:2380
kind: ClusterConfiguration
networking:
  serviceSubnet: 2001:db8:1234:5678:8:3::/112
scheduler:
  extraArgs:
    bind-address: '::'
---
apiVersion: kubelet.config.k8s.io/v1beta1
cgroupDriver: systemd
clusterDNS:
- 2001:db8:1234:5678:8:3:0:a
healthzBindAddress: ::1
kind: KubeletConfiguration
You need to modify the file with the IPv6 address ranges you will be using, because every installation will be using their own, different, addresses.
Even if you are using a Unique Local Address range, your random range will still be different from anyone else.
(This is in contrast to IPv4, where the same private local 10.x.x.x range can be used for every deployment, with NAT in front of it to get to other machines.)
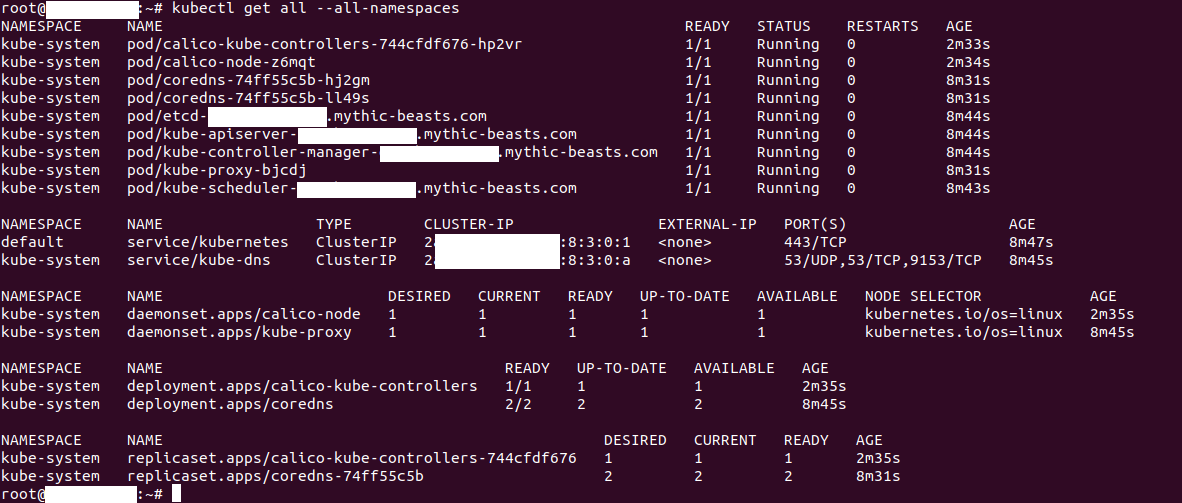
Once the kubeadm command is run, you will have a Kubernetes control plane up and running in IPv6 only. All the core components should be working, except for DNS which will be waiting for the network layer to be installed (next step).

Deploy a Container Network Interface (CNI)
Rather than use the networking from the container runtime, Kubernetes uses a plug in network layer via a Container Network Interface, with many options available.
I found IPv6 instructions for Calico, which is also the main one tested with Kubernetes, so deployed that, from https://docs.projectcalico.org/networking/ipv6
A template Calico IPv6 configuration file can also be downloaded from Github: https://raw.githubusercontent.com/sgryphon/kubernetes-ipv6/main/calico-ipv6.yaml
Like the kubeadm configuration file, all you need to do is replace the address range with your real address range (instructions on Github) and then apply the configuration.
Once Calico is started then CoreDNS will also start running:
Satisfying both kubeadm and Calico requirements
Note that the address range requirements between kubeadm and Calico are slightly different. There is a maximum difference of 16 allowed between the Pod CIDR range and the block size while Calico allows larger; and kubeadm allows any block size while the Calico block size should be 116-128.
Combining these the largest block size range is /116, making the largest Pod CIDR range /100. That allows 65,000 nodes, with 4,000 pods per node.
For the template configuration file I have a Pod CIDR of /104 and block size of /120, which is also within the combined limits. This allows 65,000 nodes with 256 pods per node.
Pod addresses will look like 2001:db8:1234:5678:8:2:xx:xxyy with xx:xx being the subnet allocated to the node, and yy being the pod on that node.
Service addresses will look like 2001:db8:1234:5678:8:3:0:zzzz.
Configure routing
I got a bit stuck on this step. I had assumed my hosting provider (Mythic Beasts) was routing the entire IPv6 to my machine, but communication between the cluster components and the outside world wasn't working.
Initially I thought that Calico was blocking packets. Setting up some ip6tables tracing for a ping from a Pod to my home machine (also on IPv6), I determined the outgoing packets were okay, but the return packets didn't make it to the machine. It wasn't a blocking rule in Calico, but a routing issue.
Talking with Mythic Beasts I worked out the /64 range was allocated but packets would only be routed if a machine correctly advertised the addresses it handled, in response to a Neighbor Discovery Protocol (NDP) solicitation.
I installed the Neighbor Discovery Protocol Proxy Daemon, from https://github.com/DanielAdolfsson/ndppd
This supports proxying of entire address ranges and I was able to set it up to automatically proxy all Pod addresses and with a static proxy for the Service address range (instructions on Github).
You may be able to set up more complicated automatic routing scenarios using the Border Gateway Protocol (BGP) support in Calico.
Add management components
With basic cluster connectivity working with the outside world, the Github repository also includes instructions to set up and expose a basic application: the Kubernetes dashboard.
You should use HTTPS for all traffic, and that means you need to set up a DNS host name for the dashboard service to get access working, although you can always test with a non-public (e.g. self-signed) certificate.
There are instructions in the guide to install:
- Helm, for package management (used to install the other components).
- Nginx Ingress, an ingress controller to manage incoming traffic.
- Cert Manager, a certificate manager to automatically provision Let's Encrypt certificates.
- Kubernetes Dashboard, a basic web management app for Kubernetes.
With IPv6 you don't have to use an ingress controller, as you can easily connect direct to the service address, but ingress has some benefits such as integrating with cert-manager to automatically configure certificates.
Once installed, cert-manager can be tested against the Let's Encrypt staging servers (to avoid request limit issues), and once working changed over to the production servers to get a real certificate.

Success! A full Kubernetes cluster running on IPv6 only, accessible to the outside world via HTTPS.
Mentions