Deploying a secure LwM2M IPv6 test server on AWS(15 min read)

Lightweight Machine-to-Machine (LwM2M) is a compact protocol design for Internet-of-Things (IoT) scenarios, that provides end-to-end services including efficient transport, encryption, device lifecycle, and messaging semantics. Devices deployed to the field will connect to full LwM2M endpoints, however you may also want to deploy your own LwM2M demo server for testing purposes.

This article shows you how to deploy an Eclipse Leshan server onto Amazon Web Services (AWS), configured for secure connections (COAPS for messaging, and HTTPS with basic authentication for the Web UI), accessible over the internet, and including support for both IPv6 and legacy IPv4.

First we will configure a network in AWS, then deploy the server, and then test the deployment.

The instructions below show the detail of building the deployment, but if you want a quick start to just get it up and running see the instructions on Github https://github.com/sgryphon/iot-demo-build/blob/main/aws-leshan/README-aws-leshan.md

To prepare settings and deploy the CloudFormation stacks:

aws sso login

$keyName = "leshan-demo-key".ToLowerInvariant()
$sshFolder = "~/.ssh"
$keyPath ="$sshFolder/$keyName.pem"
aws ec2 create-key-pair --key-name $keyName --query 'KeyMaterial' --output text | Out-File $keyPath

$ENV:CDK_DEFAULT_ACCOUNT = ${ENV:AWS_PROFILE}.Split('-')[1]
$ENV:CDK_DEFAULT_REGION = $ENV:AWS_DEFAULT_REGION
cdk deploy Lwm2mDemoNetworkStack
cdk deploy Lwm2mDemoServerStack --parameters Lwm2mDemoServerStack:basicPassword=YourSecretPassword

Read on for the full details.

AWS container diagram

CloudFormation and the Cloud Development Kit (CDK)

The deployment uses the Cloud Development Kit (CDK), which is a programming language based wrapper around CloudFormation templates.

The generated infrastructure is deployed via CloudFormation in AWS. For more detail see https://aws.amazon.com/cdk/

You need to install and bootstrap the Cloud Development Kit to run the above deployments.

IPv6 network configuration in AWS

The first stack deployed is a base network.

Network configuration

The only configuration parameter for the network is the private address range used. As this demo network is not intended to be connected to anything, the range used does not matter a lot.

export interface Lwm2mDemoNetworkStackProps extends cdk.StackProps {
  readonly ipv4PrivateAddresses?: IIpAddresses;
}

Base network creation

We use the level 2 VPC construct in the Cloud Development Kit library to get a basic network structure. By default this deploys one public and private network per availability zone. For this demo we are only deploying one zone (two networks), although the default for redundancy is at least three.

We also manually create the NAT provider and pass it in, so we can reference it later. Although we aren't using the private network, leaving the default will create a NAT gateway, using the provider, for us.

const maxAzs = 1;
const natProvider = NatProvider.gateway();
this.vpc = new Vpc(this, 'VPC', {
    ipAddresses: props?.ipv4PrivateAddresses,
    maxAzs: maxAzs,
    natGatewayProvider: natProvider,
});

Adding IPv6 to the virtual private cloud

We assign an Amazon-provided /56 block to the VPC for the public network.

If we were also using the private network we could assign a second /56 block, to keep the ranges organised. IPv6 addresses are far more plentiful than IPv4, so rather than fiddling trying to balance netmask sizes, we can just add more blocks as needed.

We also tag the network as dual stack, as good pratice.

const ipv6PublicBlock = new CfnVPCCidrBlock(this.vpc, 'Ipv6PublicBlock', {
    amazonProvidedIpv6CidrBlock: true,
    vpcId: this.vpc.vpcId
});
Tags.of(this.vpc).add('aws-cdk-ex:vpc-protocol', 'DualStack',
  { includeResourceTypes: [CfnVPC. CFN_RESOURCE_TYPE_NAME] });

If we were also going to configure private subnets, then we would also add an IPv6 egress-only gateway to the VPC.

Subnet configuration for IPv6

We need to loop through and update each of the default created public subnets (we will only have one) to support IPv6. Public networks need to be dual-stack, so that an IPv4 address can be assigned to the NAT Gateway, so that we can enable NAT64.

Other changes to the network:

  • Auto-assign IPv6 addresses and disable automatic mapping of public IPv4 addresses. AWS will now be charging for public IPv4 addresses, so we only want them used when explicitly added.
  • Assign an IPv6 /64 subnet, just numbering them sequentially. This uses the CloudFormation CIDR function to generate the values at deploy time (you can see the function used in the synthesized template).
  • A dependency to the IPv6 block is also added, so that deploy/destroy is done in the correct sequence.
  • Enable DNS64, so that IPv6-only machines on the network will be able to access external IPv4 destinations using NAT64.

We also update the route for the public network to connect IPv6 traffic to the internet gateway, and also a NAT64 route to the NAT Gateway.

const ipv6CidrBlocks = Fn.cidr(
  Fn.select(0, this.vpc.vpcIpv6CidrBlocks),
  maxAzs,"64");
this.vpc.publicSubnets.forEach((subnet, index) => {
    Tags.of(subnet).add('aws-cdk-ex:subnet-protocol', 'DualStack', { includeResourceTypes: [CfnSubnet.CFN_RESOURCE_TYPE_NAME] });

    const cfnSubnet = subnet.node.defaultChild as CfnSubnet;
    cfnSubnet.assignIpv6AddressOnCreation = true;
    cfnSubnet.enableDns64 = true;
    cfnSubnet.ipv6CidrBlock = Fn.select(index, ipv6CidrBlocks);
    cfnSubnet.mapPublicIpOnLaunch = false;
    cfnSubnet.privateDnsNameOptionsOnLaunch = {
        EnableResourceNameDnsAAAARecord: true,
        EnableResourceNameDnsARecord : true
    };
    cfnSubnet.addDependency(ipv6PublicBlock);

    const sn = subnet as Subnet;
    sn.addRoute('Ipv6Default', {
        destinationIpv6CidrBlock: '::/0',
        routerId: this.vpc.internetGatewayId!,
        routerType: RouterType.GATEWAY,
    });

    const natGatewayId = natProvider.configuredGateways[index].gatewayId;
    sn.addRoute('Nat64', {
        destinationIpv6CidrBlock: '64:ff9b::/96',
        routerId: natGatewayId,
        routerType: RouterType.NAT_GATEWAY,
    });
});

An private dual stack network would have similar alterations, using the Egress-only gateway for IPv6. For simpler configuration, private networks can also be IPv6 only.

Tagging and output

Best practice is to apply relevant identifcation tags when resources are created.

We also register the key identifiers as outputs, so they will be available in the stack output.

Tags.of(this).add('Owner', 'IoT Demo');
Tags.of(this).add('Classification', 'Confidential');

new CfnOutput(this, 'VpcId', { value: this.vpc.vpcId });
new CfnOutput(this, 'PublicSubnetIds', { value: this.vpc.publicSubnets.map(x => x.subnetId).join(',') });

AWS VPC created

Leshan server deployment and configuration

This stack will set up an EC2 Instance, connect it to the network with appropriate security permissions, and then install the Java runtime and download the Leshan server ready to install.

The Caddy 2 reverse proxy is also installed on the instance, to provide HTTPS support and basic authentication for the Leshan web interface.

Server configuration

The configuration details include the address suffix (100d) for the server, the instance type, SSH key name, and a reference to the VPC from the network stack.

If you have your own DNS, you can configure a known entry for the IPv6 address of server, based on the prefix assigned to the network and the assigned suffix. Passing in the host name will configure Caddy to provide HTTPS for the name.

If you don't have your own DNS, then leave this blank. AWS only provides DNS names for IPv4 addresses, so you will have to use IPv4 for the web interface (but can use IPv6 for the device connection). If hostName is black, then script will auto-generate based on the name assigned by AWS to the IPv4 address.

export interface Lwm2mDemoServerStackProps extends cdk.StackProps {
  readonly addressSuffix?: string;
  readonly hostName?: string;
  readonly instanceType?: InstanceType;
  readonly keyName?: string;
  readonly vpc?: Vpc;
}

The deployment also has a CloudFormation parameter for the web UI password:

// Get password from parameter
const basicPassword = new CfnParameter(this, "basicPassword", {
  type: "String",
  description: "Password used to secure the Leshan web interface",
});

Server role

The deployment creates a role for the server, with good practice configuration for CloudWatch logs.

const serverRole = new Role(this, 'serverEc2Role', {
  assumedBy: new ServicePrincipal('ec2.amazonaws.com'),
  inlinePolicies: {
    ['RetentionPolicy']: new PolicyDocument({
      statements: [
        new PolicyStatement({
          resources: ['*'],
          actions: ['logs:PutRetentionPolicy'],
        }),
      ],
    }),
  },
  managedPolicies: [
    ManagedPolicy.fromAwsManagedPolicyName('AmazonSSMManagedInstanceCore'),
    ManagedPolicy.fromAwsManagedPolicyName('CloudWatchAgentServerPolicy'),
  ],
});

Network security

We allow inboud LwM2M on ports 5683 and 5684, for both IPv4 and IPv6. We also allowing incoming HTTP and HTTPS traffic for the web UI (ports 80 and 443), and enable Ping for basic testing.

As this is a demo server, we also configure SSH access, so that we can log in and run the Leshan demo server.

this.securityGroup = new SecurityGroup(this, 'Lwm2mDemoSecurityGroup', {
  vpc: props!.vpc!,
  description: 'Security Group for LwM2M demo server',
  allowAllOutbound: true,
  allowAllIpv6Outbound: true,
});
this.securityGroup.addIngressRule(Peer.anyIpv6(), Port.tcp(22), 'Allow IPv6 SSH (22) inbound');
this.securityGroup.addIngressRule(Peer.anyIpv6(), Port.tcp(80), 'Allow IPv6 HTTP (80) inbound')
this.securityGroup.addIngressRule(Peer.anyIpv6(), Port.tcp(443), 'Allow IPv6 HTTPS (443) inbound')
this.securityGroup.addIngressRule(Peer.anyIpv6(), Port.udpRange(5683, 5684), 'Allow IPv6 LwM2M (5683-5684) inbound')
this.securityGroup.addIngressRule(Peer.anyIpv6(), Port.allIcmpV6(), 'Allow IPv6 ICMP inbound');
this.securityGroup.addIngressRule(Peer.anyIpv4(), Port.tcp(22), 'Allow IPv4 SSH (22) inbound');
this.securityGroup.addIngressRule(Peer.anyIpv4(), Port.tcp(80), 'Allow IPv4 HTTP (80) inbound')
this.securityGroup.addIngressRule(Peer.anyIpv4(), Port.tcp(443), 'Allow IPv4 HTTPS (443) inbound')
this.securityGroup.addIngressRule(Peer.anyIpv4(), Port.udpRange(5683, 5684), 'Allow IPv4 LwM2M (5683-5684) inbound')
this.securityGroup.addIngressRule(Peer.anyIpv4(), Port.icmpPing(), 'Allow IPv4 ICMP ping inbound');

DNS host name, for Caddy configuration

If a manual host name is not provided, we convert the Elastic IP public address into the corresponding DNS entry, by combining it with the region name.

var eip = new CfnEIP(this, "Ip");
var hostName = props?.hostName;
if (!hostName) {
  hostName = 'ec2-' + Fn.join('-', Fn.split('.', eip?.attrPublicIp!)) + '.'
    + Stack.of(this).region + '.compute.amazonaws.com'
}

Cloudinit configuration

This configures the server software, with two main parts: Caddy and Leshan.

Caddy comes from a community project (COPR), so the relevant repository needs to be enabled for installation. Using cloud-init a user is created to run the service, and then a template configuration file is created, injecting the public DNS host name of the server.

Additional shell commands then hash the provided secret password and insert it into the basicauth settings of the configuration file. The configuration is done in two passes, with the DNS host name inserted from the CDK/CloudFormation template, and then the hashed password set by a shell command on the server using caddy hash-password and sed (with the command containing the injected password parameter).

Note the shell encoding of the environment variable when passing to sed -- we are using : as the separator and then using shell encoding to escape any : in the hashed value (originally the problem was with the base64 hash containing / characters and using / as the traditional separator; using : should not clash, but we are escaping anyway just in case it changes).

For Leshan, we first install the Java runtime from the system package, and then download the Leshan server files.

const init = CloudFormationInit.fromConfigSets({
  configSets: { default: ['caddy', 'leshan'], },
  configs: {
    caddy: new InitConfig([
      InitUser.fromName('caddy', { 
        homeDir: '/var/lib/caddy',
      }),
      InitFile.fromString('/etc/caddy/Caddyfile',
        hostName + ' {\n'
        + '  basicauth {\n'
        + '    iotadmin __hashed_password_base64__\n'
        + '  }\n'
        + '  reverse_proxy localhost:8080\n'
        + '}\n',
        { group: 'caddy', owner: 'caddy', }
      ),
      InitCommand.shellCommand('sudo yum -y copr enable @caddy/caddy epel-7-$(arch)'),
      InitCommand.shellCommand('sudo yum -y install caddy'),
      InitCommand.shellCommand('HASHED_PASSWORD=$(caddy hash-password --plaintext \'' + basicPassword.valueAsString + '\');'
        + ' echo $HASHED_PASSWORD;' 
        + ' sudo sed -i s:__hashed_password_base64__:${HASHED_PASSWORD//:/\\:}:g /etc/caddy/Caddyfile'),
      InitCommand.shellCommand('sudo systemctl enable --now caddy'),
    ]),
    leshan: new InitConfig([
      InitPackage.yum('java-17-amazon-corretto'),
      InitCommand.shellCommand('mkdir /home/ec2-user/leshan-server'),
      InitCommand.shellCommand('wget -O /home/ec2-user/leshan-server/leshan-server-demo.jar https://ci.eclipse.org/leshan/job/leshan-1.x/lastSuccessfulBuild/artifact/leshan-server-demo.jar'),
    ]),
  }
});

If there are any issues with configuration, you can check the cloud-init logs. Here we can see how NAT64 is used to download the Leshan server package from the IPv4 only Eclipse server:

Cloud-init logs showing NAT64

Creating the server instance

A few other configuration parameters are specified, and then the server instance is created, using the cloud-init defined above, the required security group, and the SSH key name from the passed in configuration.

const az = cdk.Stack.of(this).availabilityZones[0];
const subnetSelection: SubnetSelection = {
  subnetType: SubnetType.PUBLIC,
  availabilityZones: [ az ],
};

const machineImage = MachineImage.latestAmazonLinux2023({
  cachedInContext: false,
  cpuType: AmazonLinuxCpuType.X86_64,
});

this.instance = new Instance(this, 'Instance', {
  init: init,
  initOptions: {
    ignoreFailures: true,
    timeout: Duration.minutes(10),
  },
  instanceType: props?.instanceType!,
  keyName: props?.keyName,
  machineImage: machineImage,
  securityGroup: this.securityGroup,
  role: serverRole,
  userDataCausesReplacement: true,
  vpc: props!.vpc!,
  vpcSubnets: subnetSelection,
});

Assign public IPv4

We associate the public IPv4 address with the instance. This association is separate from the instance itself, allowing new instances to be created and then the association moved across, keeping the same public IPv4 address.

// Assign Elastic IPv4
const ec2Assoc = new CfnEIPAssociation(this, "Ec2Association", {
  eip: eip!.ref,
  instanceId: this.instance.instanceId
});

Assign a known IPv6 address

We also assign a known IPv6 address, from the network prefix and a static suffix, so that the server is easy to reference (e.g. set up DNS).

The default network interface on the instance (above) will have a private IPv4 address, and will also be automatically assigned a random IPv6 address.

The known IPv6 address is then assigned to a second network interface and attached to the instance, similar to IPv4 Elastic IP association.

This allows CloudFormation to replace the instance but keep the known IPv6 address: a new instance is first created (with a random IPv6 address), the network interface attachment is then moved from the old instance to the new, and then the old instance is deleted.

If we try to assign the known address directly to the instance then it can not be easily redeployed as the address is not available to create the replacement whilst the old instance is still running. Having the network interface (holding the address) as a separate resource allows it to be moved.

const vpcBlock = 0;
const subnetBlock = 0;
const addressBlock = Fn.select(subnetBlock, 
  Fn.cidr(Fn.select(vpcBlock, props?.vpc?.vpcIpv6CidrBlocks!), subnetBlock + 1, "64"));
const split = Fn.split(":", addressBlock)
const ipv6Address = Fn.join(":",
  [ Fn.select(0, split), Fn.select(1, split), Fn.select(2, split), Fn.select(3, split),
    "", props?.addressSuffix! ]);

const networkInterface = new CfnNetworkInterface(this, 'Network', {
  ipv6Addresses: [ { ipv6Address: ipv6Address } ],
  groupSet: [ this.securityGroup.securityGroupId ],
  subnetId: props?.vpc?.selectSubnets(subnetSelection).subnetIds[0]!,
});

const networkAttachment = new CfnNetworkInterfaceAttachment(this, 'NetworkAttachment', {
  deviceIndex: '1',
  instanceId: this.instance.instanceId,
  networkInterfaceId: networkInterface.attrId,
});

Server output parameters

There instance ID is created as a named output, so that we can reference it to obtain the runtime details.

new CfnOutput(this, 'instanceId', { value: this.instance.instanceId });

Testing the deployment

After the creation process, you can query the instance details via the AWS CLI:

$leshanStack = aws cloudformation describe-stacks --stack-name Lwm2mDemoServerStack | ConvertFrom-Json
$leshanInstance = aws ec2 describe-instances --instance-ids $leshanStack.Stacks[0].Outputs[0].OutputValue | ConvertFrom-Json
$leshanInstance.Reservations.Instances.NetworkInterfaces.Ipv6Addresses.Ipv6Address, $leshanInstance.Reservations.Instances.PublicDnsName

Connecting to the server via SSH

You can use SSH, with the private key, to access the server directly:

$leshanStack = aws cloudformation describe-stacks --stack-name Lwm2mDemoServerStack | ConvertFrom-Json
$leshanInstance = aws ec2 describe-instances --instance-ids $leshanStack.Stacks[0].Outputs[0].OutputValue | ConvertFrom-Json
ssh -i ~/.ssh/leshan-demo-key.pem "ec2-user@$($leshanInstance.Reservations.Instances.NetworkInterfaces.Ipv6Addresses.Ipv6Address[1])"

Then run the Leshan server, from the remote shell:

nohup java -jar /home/ec2-user/leshan-server/leshan-server-demo.jar &

This will run the service in the background (use fg to recover it).

Viewing the Leshan web UI

The web portal is accessible via HTTPS, using the DNS name $leshanInstance.Reservations[0].Instances.PublicDnsName

You will be prompted with to enter a username ('iotadmin') and the web password that you configured.

Leshan web UI: banner

Download the Leshan demo client

You can use the Leshan demo client to test.

Install Java Runtime Environment if needed:

sudo apt install default-jre

Download the test client to a working folder:

cd ../temp
wget https://ci.eclipse.org/leshan/job/leshan/lastSuccessfulBuild/artifact/leshan-client-demo.jar

Configuring pre-shared key security

Generate the pre-shared key (PSK) ID and key, e.g.

$id = "urn:imei:3504577901234567"
$key = ((Get-Random -Max 0xff -Count 32|ForEach-Object ToString X2) -join '')
$id, $key

In the Leshan Web UI, go to Security > Add new client security configuration, and enter the following:

  • Client endpoint: urn:imei:3504577901234567 (as above)
  • Security mode: Pre-Shared Key
  • Identity: urn:imei:3504577901234567
  • Key: (as generated)

Click Create, and the endpoint will be added to the list.

Leshan web UI: client security configuration

Running the client

Run the demo client, passing in the address of the Azure Leshan server.

$leshanStack = aws cloudformation describe-stacks --stack-name Lwm2mDemoServerStack | ConvertFrom-Json
$leshanInstance = aws ec2 describe-instances --instance-ids $leshanStack.Stacks[0].Outputs[0].OutputValue | ConvertFrom-Json
$leshanInstance.Reservations[0].Instances.Ipv6Address
java -jar ./leshan-client-demo.jar -n $id -i $id -p $key -u "coaps://[$($leshanInstance.Reservations.Instances.NetworkInterfaces.Ipv6Addresses.Ipv6Address[1])]:5684"

In the web UI, you will be able to see the device connected, with the client address and security indicator. Note the IPv6 addresses being used (web UI and client), the padlock icon in the web UI, and the use of COAPS in the client console, with DTLS full handshake.

Leshan client connected in UI

Cloud to device messages

From the device screen you can operate functions like reading values from the client.

Leshan cloud read client object

Next steps

Once you have a secure LwM2M test server set up on the Internet, you can use it to test and validate devices. We will look to cover the device side in a future article.

Consider the Telstra Wireless Application Development Guidelines, particularly the considerations around IPv6 and security; and if you are looking to get devices Telstra Certified then these features are required: https://www.telstra.com.au/business-enterprise/products/internet-of-things/capabilities

In some cases existing devices may not support IPv6 -- the deployed LwM2M server is dual stack, so you can also access it via IPv4.

You may also have existing devices that don't support COAPS security. In these cases you would need to set up a private APN (Access Point Name) and private network to your service endpoint, to ensure that credentials are kept secure. For testing purposes you can also connect to the test server via unecrypted COAP.

LwM2M is a standardised protocol, with defined semantics that immediately allow any confirming device to communicate meaningful information. A large number of LwM2M objects are defined, covering a variety of scenarios.

You can also extend the protocol and create custom objects if needed, and can then load those object definitions into the system to activate them.

Deploying a secure MQTT test server on Azure with IPv6(15 min read)

MQTT (originally Message Queuing Telemetry Transport) is an important protocol for IoT that has been widely adopted. Devices deployed to the field may be connecting to existing MQTT endpoints, however you may also want to deploy your own MQTT server for testing purposes.

This article shows you how to deploy an Eclipse Mosquitto MQTT server onto Azure, configured for secure connections (MQTTS, which is MQTT over TLS), accessible over the internet, and including support for both IPv6 and legacy IPv4.

First we will configure a network in Azure, then deploy the server, and then test the deployment.

The instructions below show the individual commands, but if you want a quick start then full scripts, with automatic parameters, are available on Github https://github.com/sgryphon/iot-demo-build/blob/main/azure-mosquitto/README-mosquitto.md

To deploy the network and then server components via the scripts:

az login
az account set --subscription <subscription id>
$VerbosePreference = 'Continue'
./azure-landing/infrastructure/deploy-network.ps1
./azure-mosquitto/infrastructure/deploy-mosquitto.ps1 YourSecretPassword

Read on for the full details.

Continue reading Deploying a secure MQTT test server on Azure with IPv6(15 min read)

Securing your IPv6-only docker server(8 min read)

It is important to ensure your IPv6-only docker server is secure.

First configure your firewall to allow secure shell (SSH), port 22, so that you can maintain your remote connection.

Then turn on your firewall with default deny incoming and default deny routing rules.

This ensures your server is secure-by-default, and only then should you allow routing to the specific containers and ports that you want to expose.

My server runs Ubuntu, so these instructions are based on the Uncompliciated Firewall (UFW), but similar considerations apply to other platforms

Continue reading Securing your IPv6-only docker server(8 min read)

Running an IPv6-only host — redux(11 min read)

I have previously blogged about why you should consider IPv6 only hosting and setting up Apps on Kubernetes IPv6 to run my WordPress blog.

Kubernetes is not really designed for a single server (but is great for scaling and enterprise system), and although it was good experience learning how to set it up on IPv6, the overhead was too much and I eventually ended up with a crashed blog.

I'm still running IPv6 only, but with a much simpler set up.

This consists of docker, configured to run with IPv6, with docker-compose to run the different components and systems.

If you are planning on setting up your own server, read my notes on Securing your IPv6-only docker server before starting.

On my server there are currently three instances of WordPress for different websites, and 3 corresponding databases, as well as a Matrix Synapse server and plugins.

Read on for my notes on initial setup of the server with IPv6 and connectivity testing, including addressing schemes, docker configuration, IPv6 network address translation, and the Network Discovery Protocol Proxy Daemon.

Continue reading Running an IPv6-only host — redux(11 min read)

Crashed blog… now restored(1 min read)

So, I pushed the single-server Kubernetes cluster that I was running my blog on a little too far, and it crashed into a bit of a heap. The pods running the different sites, including this blog, failed, and the underlying database got corrupted.

It has been down for a few weeks now. Initially I thought it was just a server issue and rebooted. When it didn't come up, I did little bits of investigation over the following weeks, just a few hours at a time, to figure out the issue.

I managed to work out how to restore the database and get it working, but the server was not stable. It would quickly crash, and trying to activate more than one site would just cause problems.

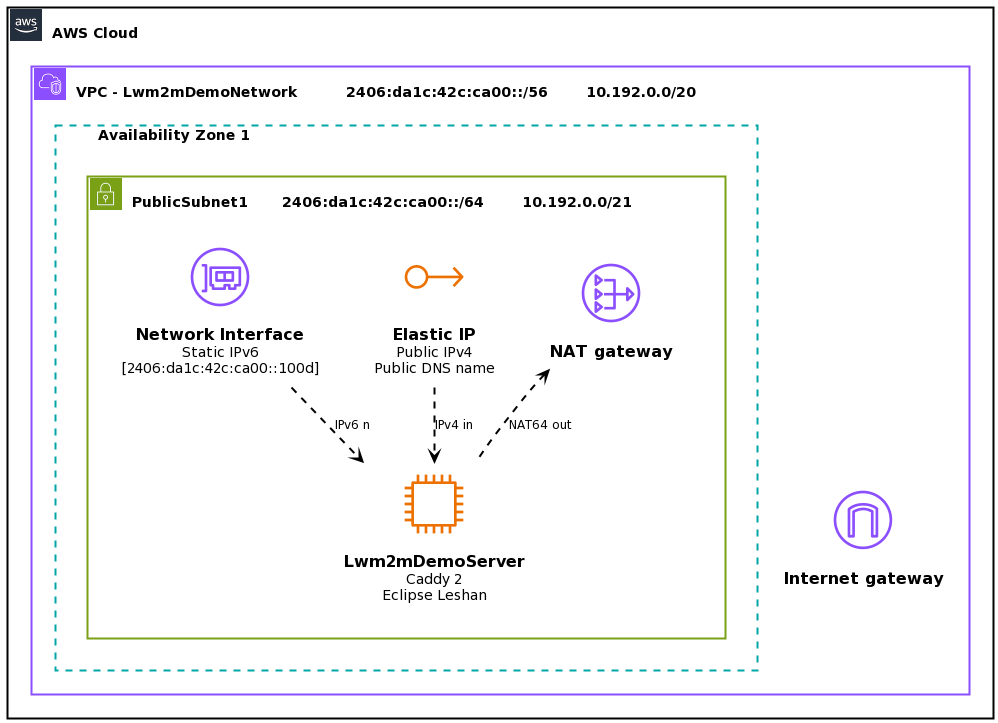
Kubernetes is quite complicated, and there is a lot of overhead for a single server. It was still a good exercise to understand the complexities of deploying Kubernetes on IPv6.

Now, deploying multiple services via containers is still a good approach, with Kubernetes simply a way to orchestrate, and manage, a large number of containers. So, I can pretty much just run the same containers, just directly (instead of inside Kubernetes).

As you can see, from this blog entry, my services are now back up and running.

There was still the complexity of running on IPv6 only, which I should probably write up in more detail, but for now a lot of it was based on an article by Stefan Kleeschulte, https://medium.com/@skleeschulte/how-to-enable-ipv6-for-docker-containers-on-ubuntu-18-04-c68394a219a2

Apps on Kubernetes IPv6 – Kubeapps, WordPress(8 min read)

Once you have Kubernetes running on IPv6 only the next step is to install some apps.

This is my first post written on my new WordPress instance, hosted on Kubernetes IPv6 only. If you are reading it, then it is working 🙂

Of course apps have their own issues not being configured by default to work with IPv6, so for each app you need to test and work out what configuration details need to be tweaked (assuming the app supports IPv6 in the first place).

To start off with, I installed Kubeapps, to get an application management dashboard, and then used that to install WordPress.

With WordPress installed, I exported the content from my old blog and then imported it into the new instance, and tweaked a few WordPress settings.

The final step was to configure the Mythic Beasts reverse proxy, to make my blog available for legacy IPv4 users.

Continue reading Apps on Kubernetes IPv6 – Kubeapps, WordPress(8 min read)

Kubernetes on IPv6 only(9 min read)

Kubernetes is an open source platform for managing containerised applications.

IPv6 is the next generation Internet protocol, and running on IPv6 only simplifies configuration and administration, and avoids the performance issues and complexities of IPv4 encapsulation, NAT, and conflicting private address ranges.

The default configuration of Kubernetes is IPv4, and there are few, and scattered, examples and guidance for setting up IPv6 dual stack, let alone single stack.

I have collected instructions from the different sources into a single guide to successfully deploy Kubernetes with IPv6 only.

See the guide for full instructions:

https://github.com/sgryphon/kubernetes-ipv6

The blog post contains some additional background on what I did to gett the deployment working. The deployment was tested on Ubuntu 20.04 running on an IPv6 only virtual server from Mythic Beasts.

Continue reading Kubernetes on IPv6 only(9 min read)

IPv6 virtual networks on Azure(2 min read)

IPv6 support for Azure VNets is currently available in preview (https://azure.microsoft.com/en-us/updates/microsoft-adds-new-features-to-ipv6-support-for-azure-vnets/).

Most of it is available via the Azure Portal, but I found allocating an IP config to a network card had to be done via the shell.

Here are the steps I did to test:

Continue reading IPv6 virtual networks on Azure(2 min read)