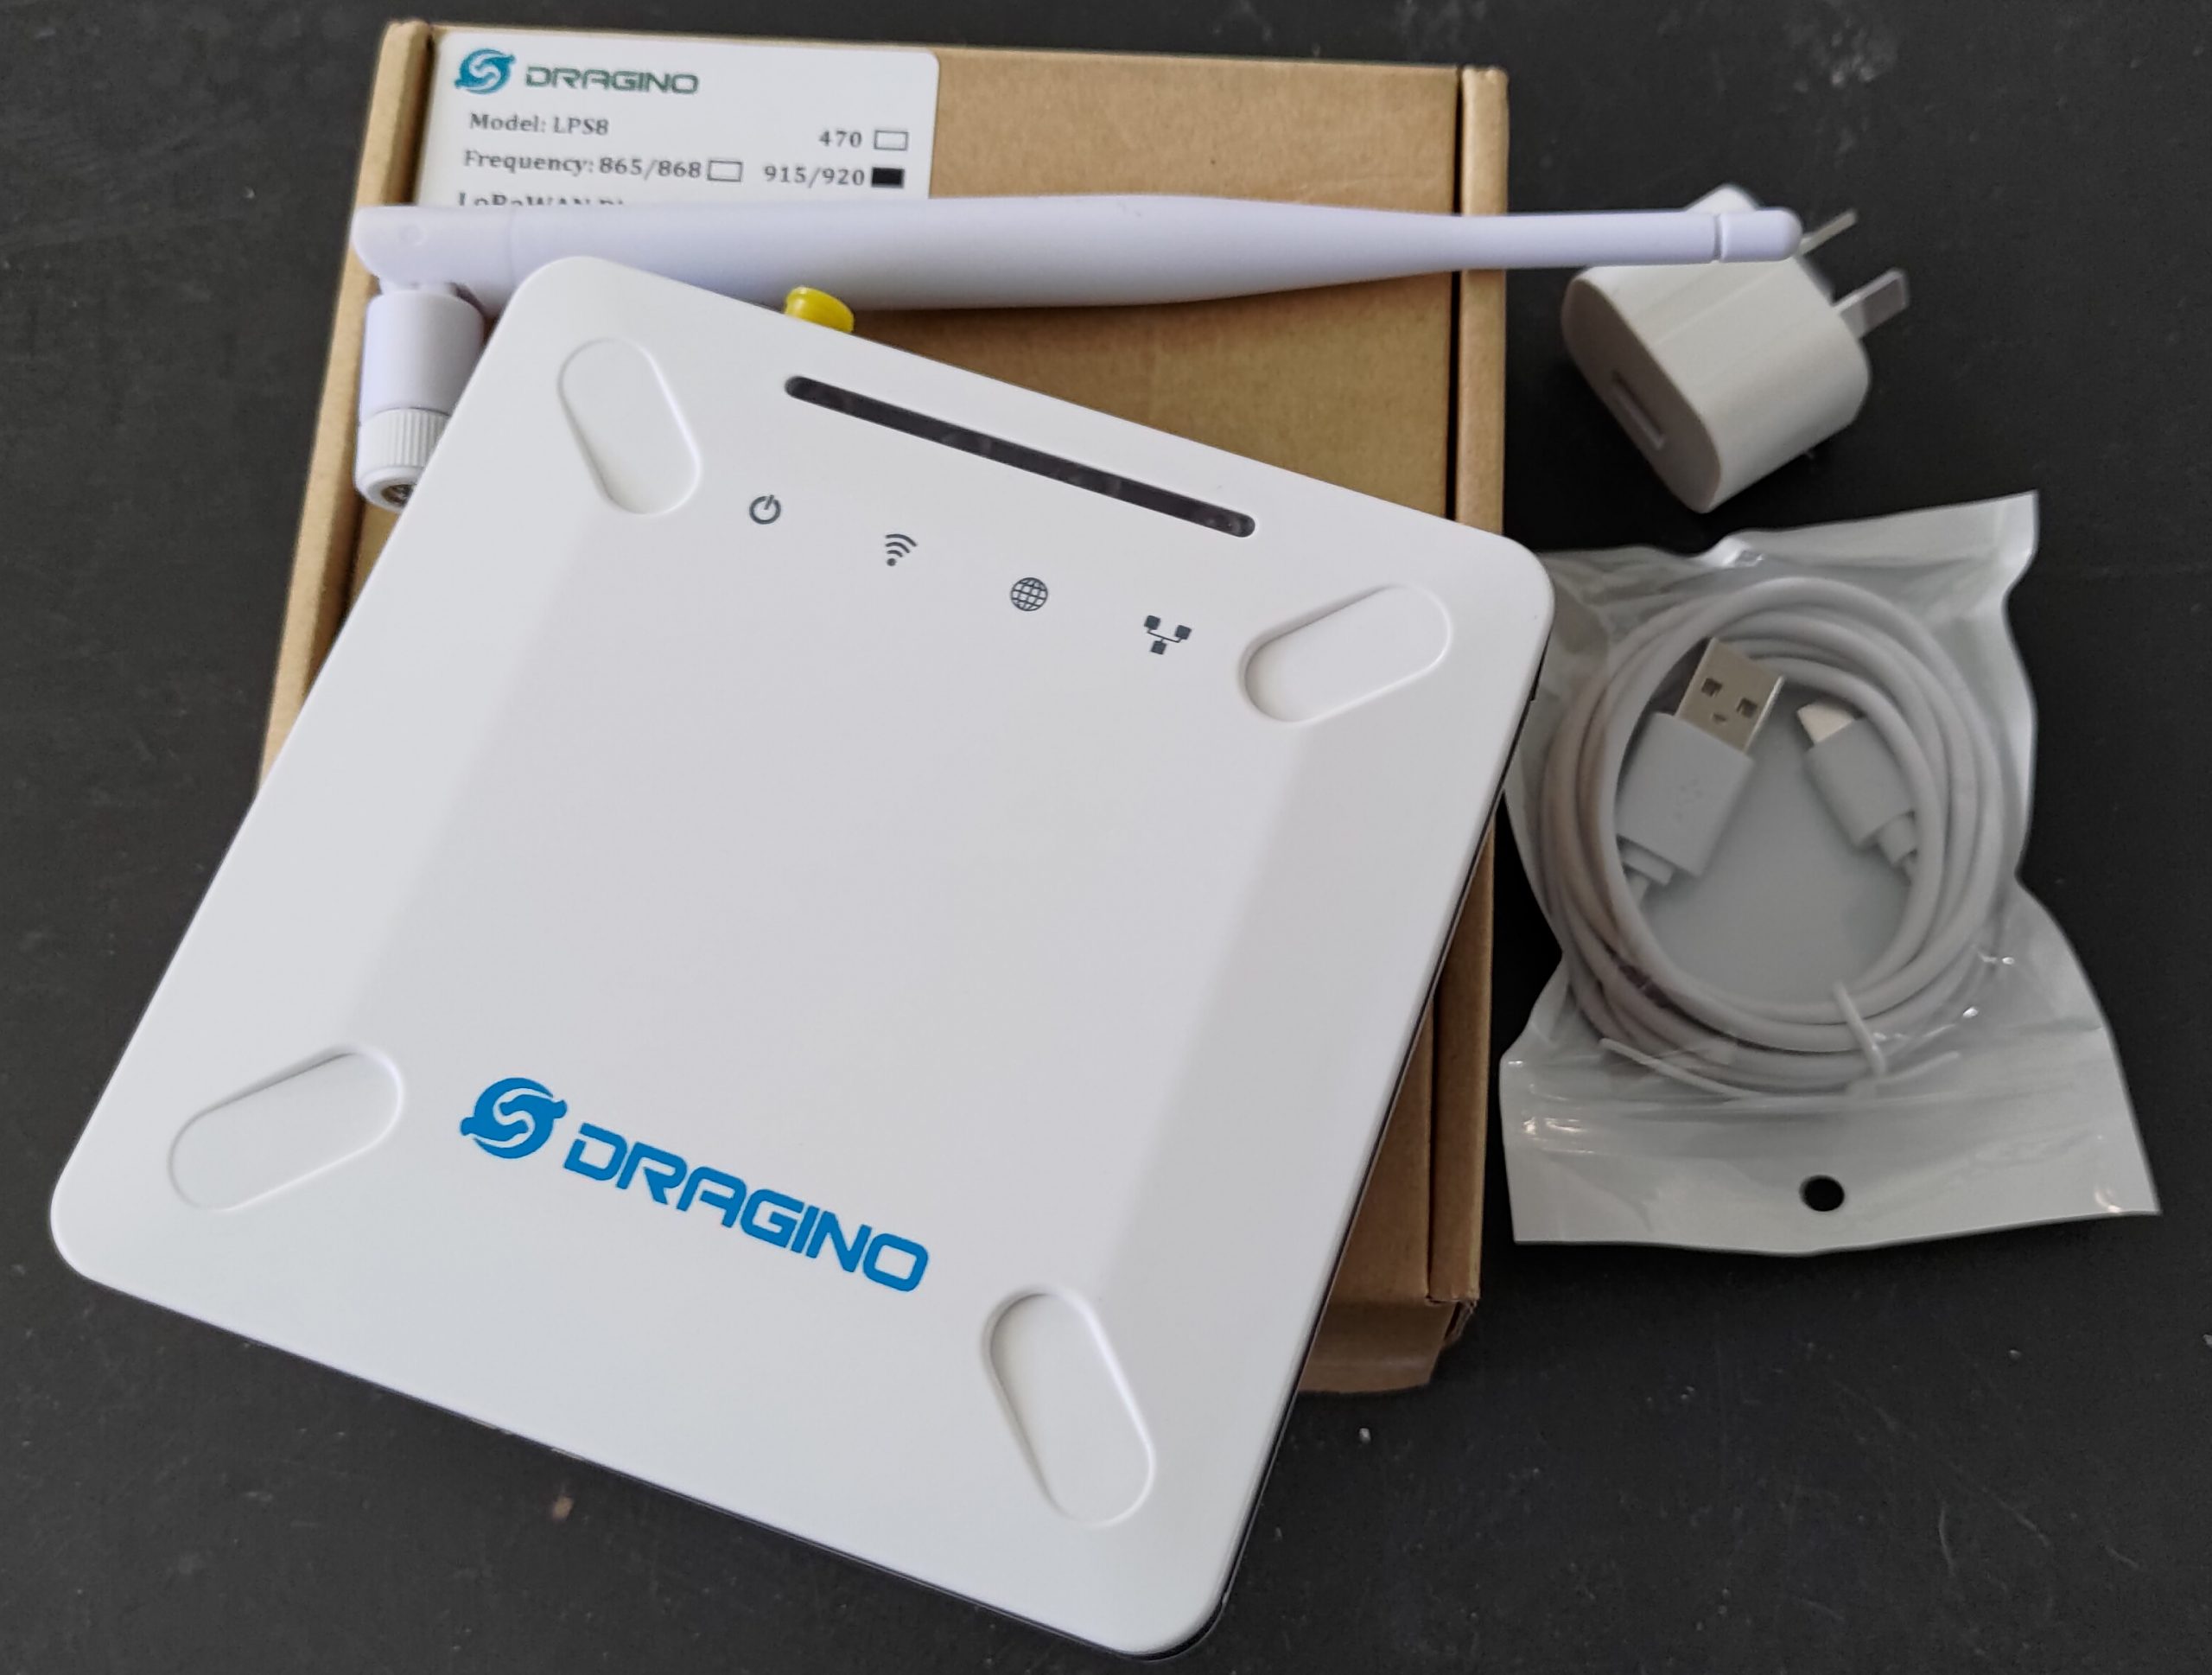
I recently got a Dragino LPS8 LoRaWAN gateway and set it up on my network. The LPS stands for LoRaWAN Pico Station.
The open source gateway runs a variant of OpenWRT and the latest version supports a range of LoRaWAN features including Basic Station. You can use it for a private network or set it up with a community as I did for The Things Network (TTN).
Unboxing the Dragino LPS8 LoRaWAN gateway
Read on for details of how easy it was to set it up securely.
For any modern dotnet system, distributed tracing is already built in to the default web client, server, and other operations.
You can see this with a basic example, by configuring your logging to display the correlation identifier. Many logging systems, such as Elasticsearch, display correlation by default. The identifiers can also be passed across messaging, such as Azure Message Bus.
Logging has always been a useful way to understand what is happening within a system and for troubleshooting. However, modern systems are very complex, with multiple layers and tiers, including third party systems.
Trying to understand what has happened when a back end service log reports an error, and then correlating that to various messages and front end actions that triggered it requires some kind of correlation identifier.
This problem has existed ever since we have had commercial websites, for over 20 years of my career, with various custom solutions.
Finally, in 2020, a standard was created for the format of the correlation identifier, and how to pass the values: W3C Trace Context. In a very short amount of time all major technology providers have implemented solutions.
The examples below show how this is already implemented in modern dotnet.
The team recently took some core bits out of project they are working on with code first Azure Digital Twins and have released it as an open source library, so I thought I would share an initial look at the project.
Why code first? Using a code first approach can make accessing Digital Twins easier for developers. They can use their native programming language and tools to develop their models, without having to learn the intricacies of DTDL (Digital Twins Definition Language) or the REST APIs for interacting with Azure Digital Twins.
What is blockchain? What makes a good blockchain? Is blockchain just a buzzword? Is a blockchain really trustless?
Let's start with the last one. The word trustless is often used to describe blockchain, however it is not really trustless — it would be better described as decentralised trust or systemic trust (trust in the system).
Rather than trust an individual (person or organisation) the trust is provided by the very system itself.
You do need to trust the transaction processors (aka miners) for the chain, and also the programmers that wrote the software being used. However you don't need to trust the individual processors or software, only that the majority are truthful. A characteristic of blockchain is that an individual bad actor, controlling only a small portion of the network, cannot take the network down.
A blockchain network can increase systemic trust through:
A large number of processors (e.g. public chain)
Multiple clients (i.e. multiple development teams)
Open source (allow visibility and the option to reject changes and go a different direction)
Only two major blockchains rate highly on these trust criteria: Bitcoin (BTC) and Ethereum (ETH). There are strong reasons why these have strong support.
Some of the others are trying, but not yet there, and worryingly some of the type cryptocurrencies are not decentralised at all, but actually controlled by a single central organisation.
So, I pushed the single-server Kubernetes cluster that I was running my blog on a little too far, and it crashed into a bit of a heap. The pods running the different sites, including this blog, failed, and the underlying database got corrupted.
It has been down for a few weeks now. Initially I thought it was just a server issue and rebooted. When it didn't come up, I did little bits of investigation over the following weeks, just a few hours at a time, to figure out the issue.
I managed to work out how to restore the database and get it working, but the server was not stable. It would quickly crash, and trying to activate more than one site would just cause problems.
Kubernetes is quite complicated, and there is a lot of overhead for a single server. It was still a good exercise to understand the complexities of deploying Kubernetes on IPv6.
Now, deploying multiple services via containers is still a good approach, with Kubernetes simply a way to orchestrate, and manage, a large number of containers. So, I can pretty much just run the same containers, just directly (instead of inside Kubernetes).
As you can see, from this blog entry, my services are now back up and running.
Application Insights is the application performance monitoring feature of Azure Monitor, and can be used to monitor deployed applications both in the cloud and on premises. App Insights supports W3C Trace Context standard headers to correlate tracing information across different components.
The features of App Insights, and Azure Monitor, are quite broad, whereas developers may want in some cases to filter down and focus on application-specific logging. Trace correlation is an important part of this, to get and end-to-end overview of operations.
To view logs, connect your App Insights instance to a Log Analytics workspace. Within the workspace, General > Logs will provide access to the query editor — you can either user one of the default Queries pop-up or write your own.
For example, to see all recent traces, and the correlation between them you can use a query like:
union AppTraces, AppDependencies, AppRequests
| where TimeGenerated > ago(30m)
   and Properties.CategoryName !startswith "Microsoft"
| sort by TimeGenerated desc
| project TimeGenerated, Type, OperationId, Id, Properties.SpanId,
   ParentId, ClientType, Message, Name, SeverityLevel, Properties,
   Properties.CategoryName, OperationName, SessionId,
   UserId, AppRoleInstance
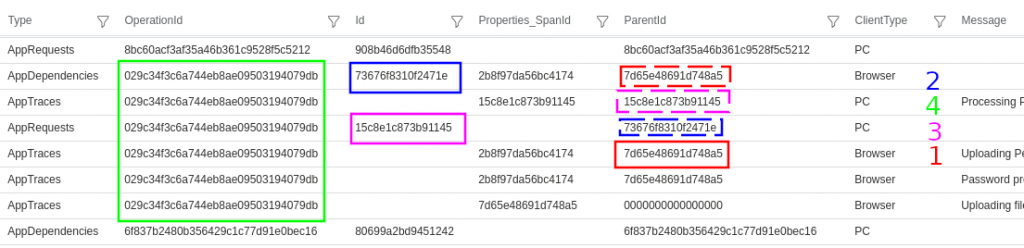
Example output:
This example shows all the traces from one operation are linked to the same OperationId 029c3..., and the parent-child relationship between two tiers client (Browser) and server (PC) can also be determined:
Client (Browser) AppTraces have a ParentId 7d65e...
The client has a link from this parent to a child AppDependency with Id 73676...
On the server (PC) the dependency is recorded as the parent if the AppRequest Id 15c7e...
Additional traces on the server show the request as the ParentId (and there may be further parent-child links depending on the number of tiers).
There are many other types of records that can be queried, for example developers may often be interested in exceptions and traces that feature a particular keyword:
union AppExceptions, AppTraces
| where TimeGenerated > ago(30m)
| sort by TimeGenerated desc
| search "Password"
This is my first post written on my new WordPress instance, hosted on Kubernetes IPv6 only. If you are reading it, then it is working 🙂
Of course apps have their own issues not being configured by default to work with IPv6, so for each app you need to test and work out what configuration details need to be tweaked (assuming the app supports IPv6 in the first place).
To start off with, I installed Kubeapps, to get an application management dashboard, and then used that to install WordPress.
With WordPress installed, I exported the content from my old blog and then imported it into the new instance, and tweaked a few WordPress settings.
The final step was to configure the Mythic Beasts reverse proxy, to make my blog available for legacy IPv4 users.
Kubernetes is an open source platform for managing containerised applications.
IPv6 is the next generation Internet protocol, and running on IPv6 only simplifies configuration and administration, and avoids the performance issues and complexities of IPv4 encapsulation, NAT, and conflicting private address ranges.
The default configuration of Kubernetes is IPv4, and there are few, and scattered, examples and guidance for setting up IPv6 dual stack, let alone single stack.
I have collected instructions from the different sources into a single guide to successfully deploy Kubernetes with IPv6 only.
The blog post contains some additional background on what I did to gett the deployment working. The deployment was tested on Ubuntu 20.04 running on an IPv6 only virtual server from Mythic Beasts.
We ran out of IPv4 addresses a few years ago, and the cost has been steadily increasing, now over USD 25.00 per IPv4 address.
Meanwhile we are increasingly using technologies such as containerised deployments and mass deployment of Internet of Things (IoT) devices, seeing an increase in demand for addresses.
About 30% of the Internet now happily talks IPv6, with several countries having more than 50% IPv6, and for a server hosting environment there are many benefits to going IPv6 only.
IPv6 only hosting is available from several providers such as Mythic Beasts.
Trying to use an IPv6 only machine runs into a roadblock when you need to access a legacy IPv4 resource.
The best solution would be to convince services to move to an IPv6 first solution, incrementally adding reverse proxies for existing services and deploying new services to IPv6 only, with an IPv4 gateway only as needed.
Deploying new services to IPv6 only is much simpler than dual-stack, as you only need to worry about one set of configuration, firewalls, etc. Adding an IPv4 proxy on top, for legacy support, is then a simple, and contained, extension.
However, until that happens you still need a solution.
I found setting up DNS64 + NAT64 for my IPv6 only machines was pretty simple with my OpenWRT router.